

Saved Views
Switch between the built-in views and your own saved views from the left panel to jump straight to the products that need a reorder, a transfer, or are out of stock.
The Views section of the Inventory Overview's left panel gives you one-click access to the products that need attention. It comes with up to five built-in views (FBA-only accounts see four, since Transfer Needed only applies when you have somewhere to transfer from), and you can save your own filtered, sorted, and column-tailored layouts as named views to reuse later. You can also rename and update your saved views in place, and mark any view as your default so it loads automatically each time you open the page.
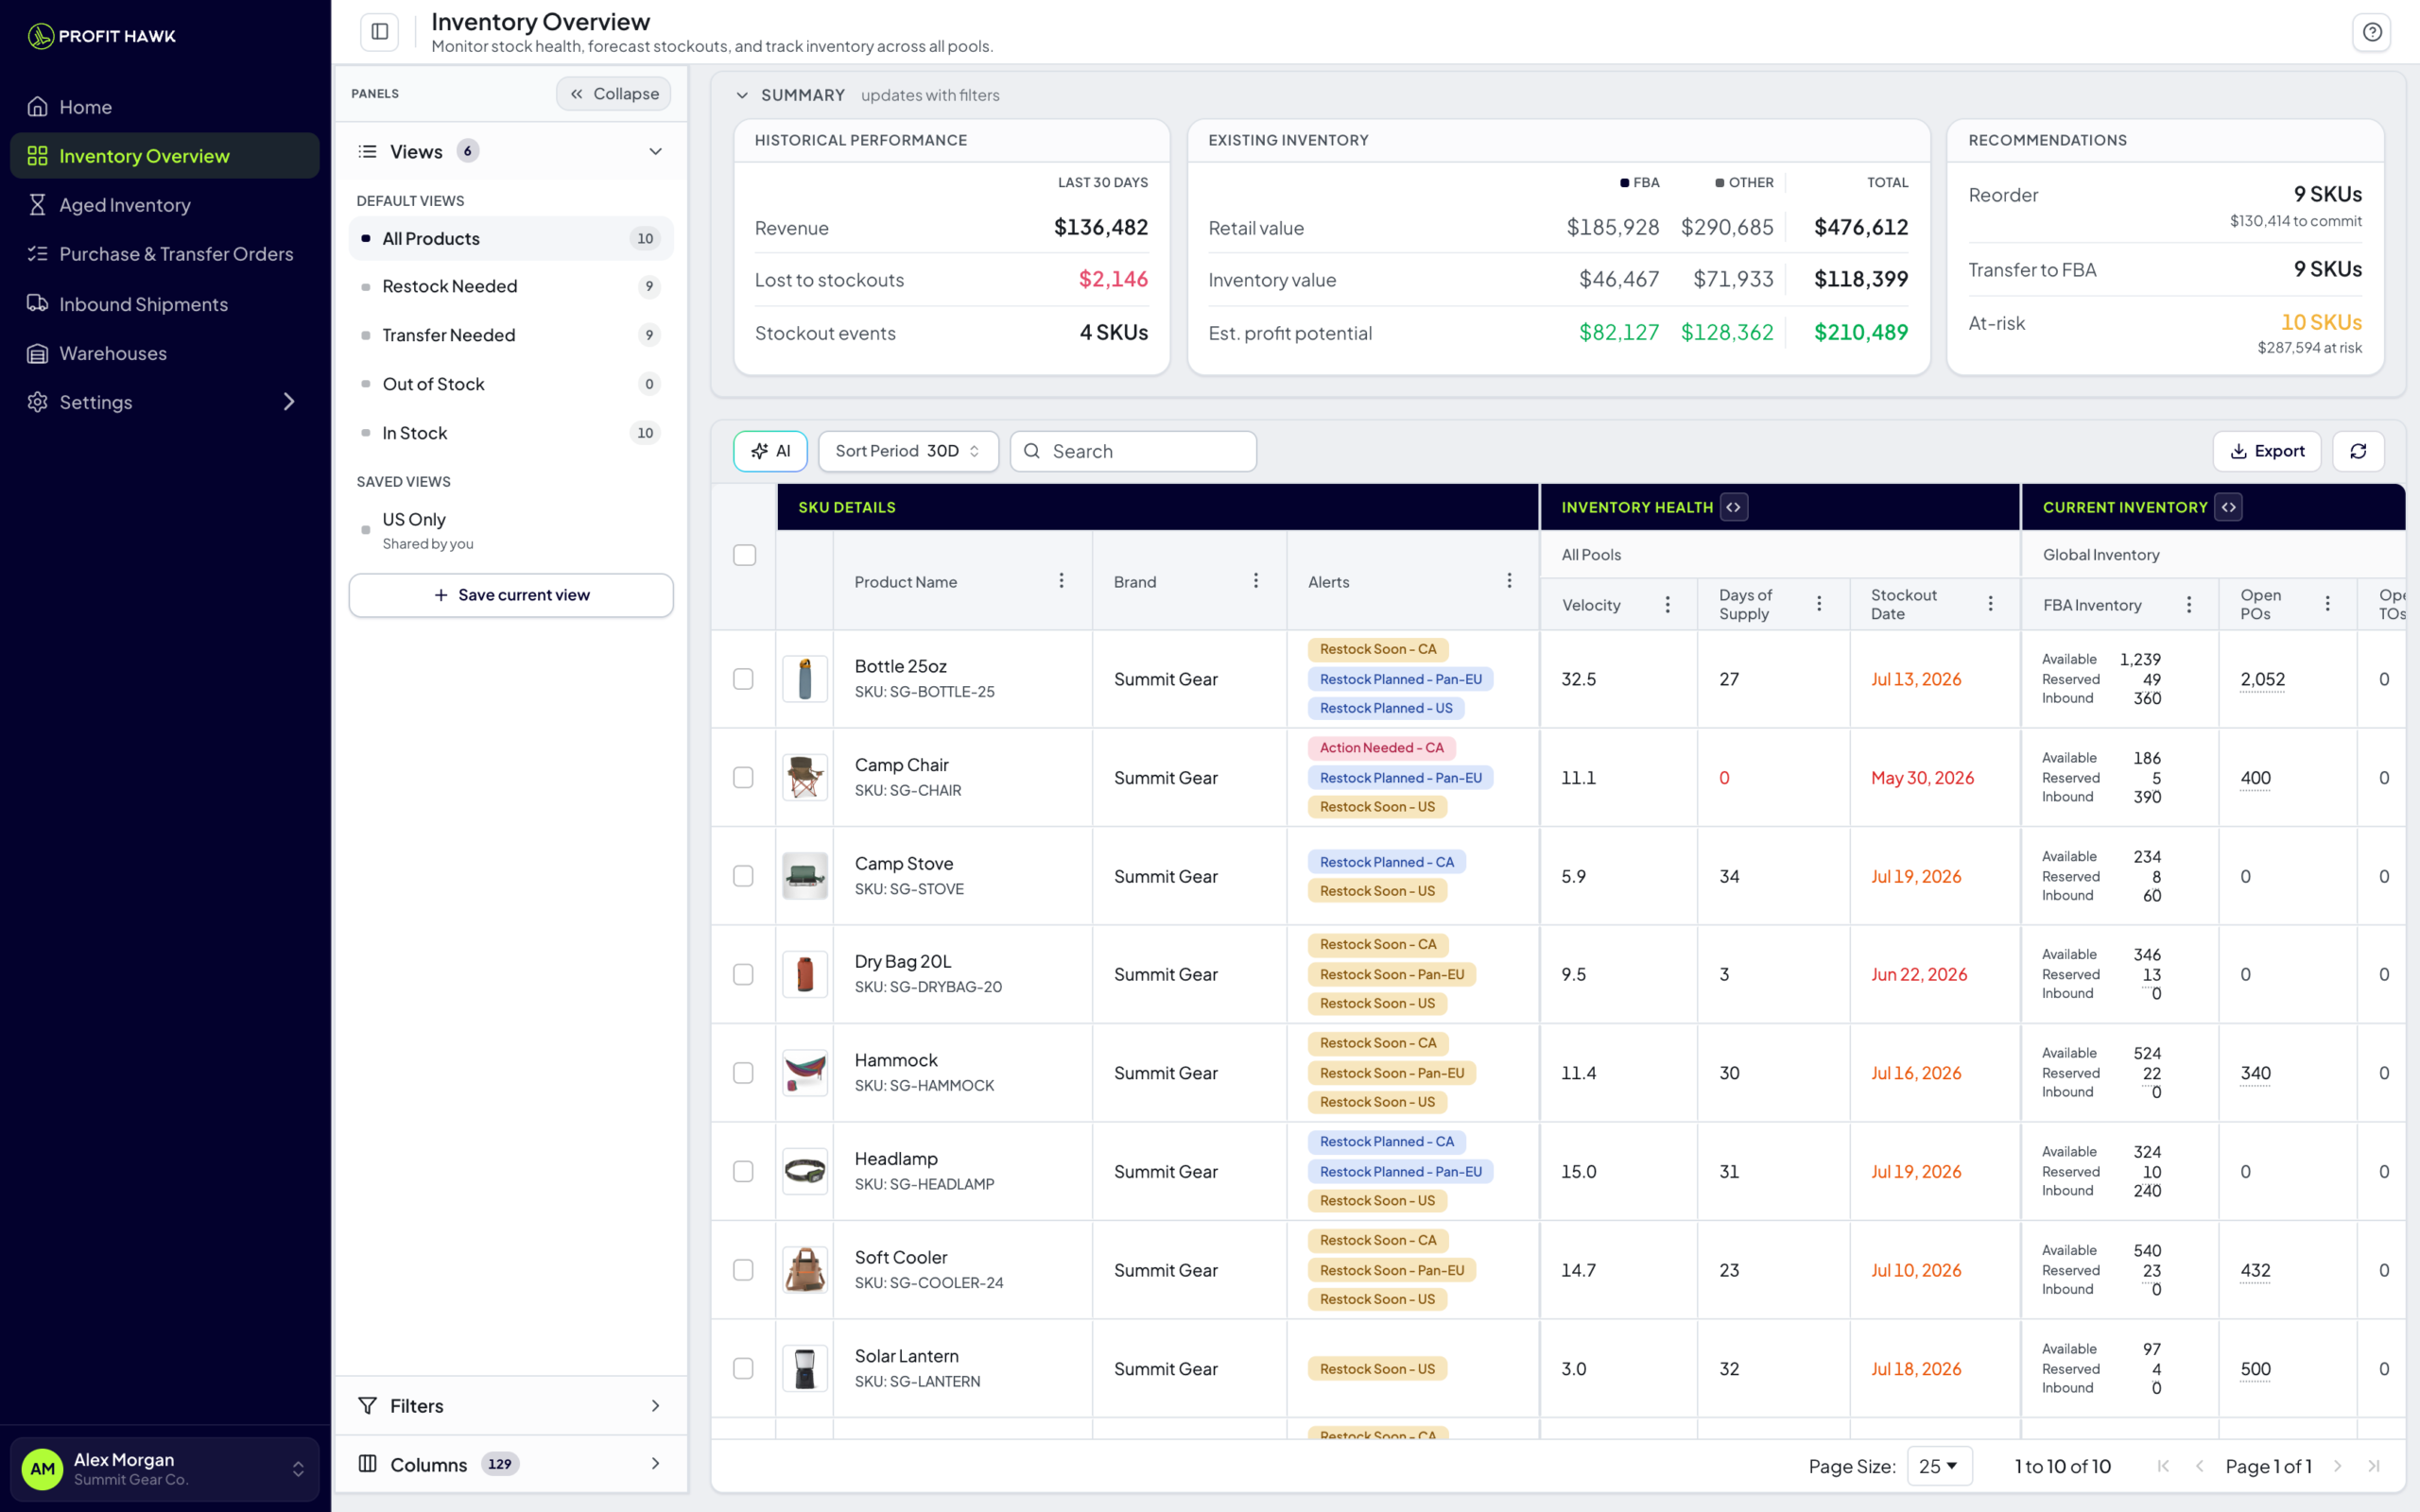
The built-in views
The left panel starts collapsed so your table has the most room. The Views tab is highlighted in that collapsed rail, so it is easy to find. Click it to expand the panel and see the built-in views, each with a count of how many products match. Selecting one applies a preset filter and a focused set of columns so you can stop scanning irrelevant data and get straight to the products that need attention.
Every active product in your catalog. No filters applied. All column groups visible.
Use this view when you want the complete picture, when you are researching a specific product, or when you want to apply your own filters from scratch.
Saving your own views
Once you have the table set up the way you like, save it as a named view so you can return to it in one click.
Set up the table
Apply any filters, sort the columns, and show or hide column groups until the table shows exactly what you want.
Save the view
Open the Views section of the left panel and click Save current view. Give it a name and confirm.
Switch back any time
Your saved view appears under Saved Views in the panel. Click it to reapply your filters, sort order, and columns instantly.
Saved views are shared with everyone in your organization, so your team can work from the same setups.
Editing a saved view
You do not have to delete and recreate a view to change it. For a view you created (or any view, if you are an organization owner or admin), you can rename it or overwrite it with your current setup. The Rename and Save changes options appear in a view's menu only when you have permission to edit it.
Open the view's menu
Hover over a saved view in the panel and click the ⋮ menu on the right of the row.
Rename it
Choose Rename, type the new name, and press Enter. The name updates for everyone in your organization.
Or overwrite it with your current setup
With the view active, adjust your filters, columns, or sort, then choose Save changes here from its menu (or click Save current view). In the dialog, pick Update this view to replace the saved layout with what is on screen, or Save as new to keep the original and create another. The dialog summarizes what the view will remember (visible columns, active filters, and sort) before you confirm.
Renaming, overwriting, and deleting a shared view are limited to the person who created it and your organization's owners and admins. If a teammate created the view, you can still apply it and save your own changes as a new view.
Set your default view
Pick the view you want to see first, and it loads automatically every time you open the Inventory Overview. This works on both built-in and saved views, and your default is personal to you, so each teammate sets their own.
Star a view
Hover over any view in the panel and click the star on the right of the row. The star fills gold to mark your default, and a hint under the Views header reads "Your default opens on load".
Change or clear it
Star a different view to move your default, or click the gold star again to clear it and go back to All Products on open. For saved views, you can also use Set as default and Remove as default in the ⋮ menu.
A bookmarked or shared link to a specific view still wins. If you open a link that points to a particular view, that view loads instead of your default.
How views work
Each view does two things:
- Applies a preset filter as a chip below the toolbar. You can see the active filter (for example, "Order Qty > 0") and remove it if you want to broaden the view.
- Hides irrelevant column groups so the table stays focused. The SKU Details group (image, product name, brand, and alerts) always stays visible. Other column groups appear or hide based on the view.
Switching views does not change the data, only what is filtered and shown.
Combining views with custom filters
You can stack your own filters on top of any view. For example, switch to Restock Needed to see all products needing a supplier order, then add a brand filter to only see one brand, or a date filter to only see orders due in the next 30 days.
Filter chips below the toolbar show what is currently applied. The chip with a small dot icon comes from the view; the others are filters you added in the Filters section of the left panel.
If you remove the view's filter chip, the table resets to All Products and all column groups reappear.
URL state
The active view is reflected in the page URL, so you can bookmark a link that opens straight to a specific view, or share it with a teammate to put them on the same view you are looking at.
Tips
Start your day on the Restock Needed and Transfer Needed views. They show only products that need an action right now, so you can decide what to do without wading through your full catalog.
Saved views capture your columns and sort order too, not just filters. If you have a layout you set up for a specific task (say, planning Pan-EU reorders), save it once and jump back whenever you need it.
Set your most-used view as your default so the Inventory Overview opens right where you work. Many sellers make Restock Needed their default.
Related
Inventory Overview
Tour of the Inventory Overview page, top to bottom.
Filtering & Searching
Add precise filters or use the AI search bar for plain-English queries.
Identify Reorders
A full walkthrough of using the Restock Needed view to plan supplier orders.
Identify Transfers Needed
A full walkthrough of using the Transfer Needed view to move stock to FBA.